
Hey guys! I’m super happy because over the weekend, I have reached over 50 followers and that is half of my goal of 100 followers by October. Thank you guys for all of your support, and I would really appreciate it if you would give word out to your friends or other blogs that you think would like me to help me to reach my goal.
With that aside, today I wanted to do a nail art post because I’ve only done one of these before, but I got such positive feedback so I wanted to show you guys something different this time. I am showing you how to do water-marbling on your nails. I used pastel colors to go along with springtime, but of course you can use whatever colors you would like. Let’s hop right into this!
What you will need:
- A small bowl that you don’t mind getting nail polish in ( I cut the top off a a plastic cup but I would not recommend doing this if you are doing this for a long time because the nail polish will eat away at the plastic)
- 5 or more nail polish colors
- A toothpick
- 15-20 q-tips
- Chapstick (optional) or nail polish remover
Step 1:
Fill your bowl up with water to a point where you can dip your finger (upside-down) in easily and keep it flat
Step 2: (optional)
If you have Chapstick, cover the skin around your fingernails up to the middle of each finger. This just makes the removal of excess nail polish much easier.
Step 3:
Pour your nail plush colors on the water in the order you would like, pouring smaller and smaller circles in the middle of the others.
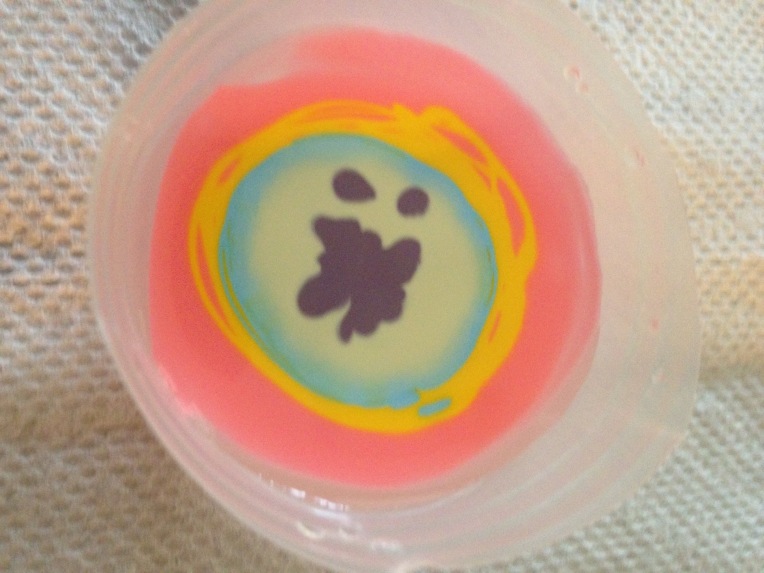
Pink: Sally Hansen Triple Shine in Pixie Slicks
Yellow: Sally Hansen Triple Shine in Lemon Shark
Blue: Color Club in Factory Girl
Green: Covergirl Outlast Stay Brilliant in Salt Water Taffy
Purple: Elf in Lilac
Step 4:
Apply a base coat to your nails if you would like.
Step 5:
Take your toothpick and carefully make designs in the nail polish. Don’t mix it too much, or the designs won’t be visible on your nails.

Step 5: Dip your nails into the designs by placing your finger in upside-down and pull it out.
Step 6: Take some q-tips and remove the excess nail polish. You will need nail polish remover for this step if you did not have the Chapstick.
Step 7: Apply a topcoat to your nails if you would like.
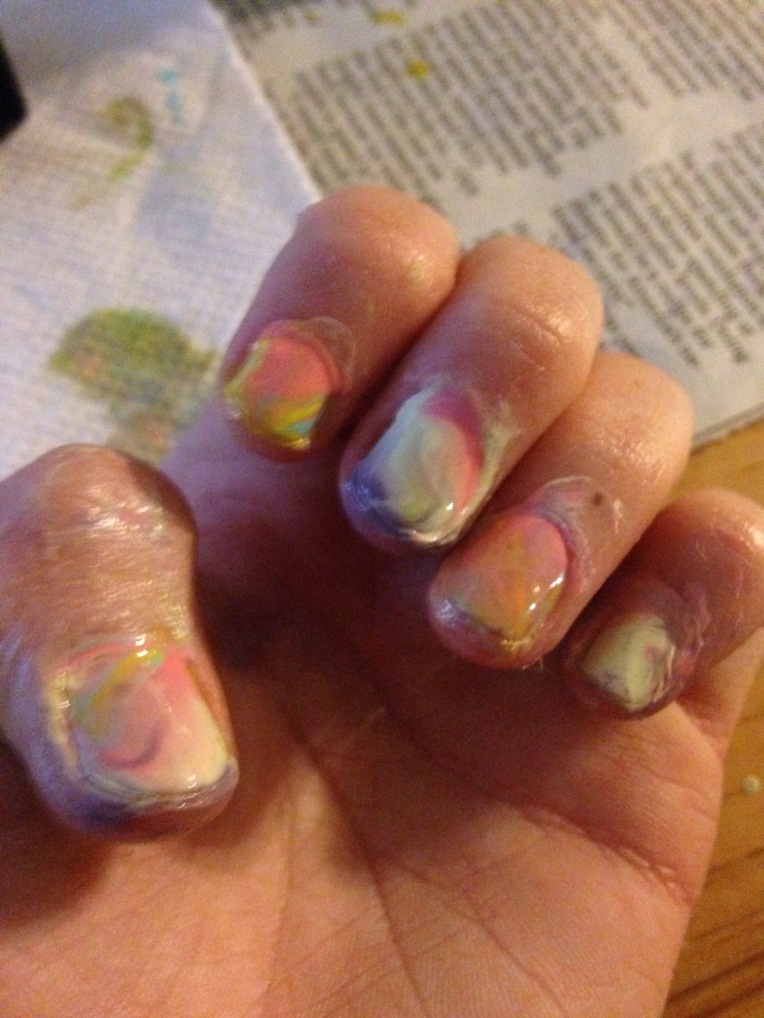
(Yes, I know there is still nail polish around my nails but it took forever to dry and to get off so I didn’t have time to take a picture of the final look)
And you are done! This is pretty easy, and looks so cool when it’s done. However, it is time consuming, but it’s great if you have a lot of free time or you get bored and don’t know what to do. I hope you guys enjoyed this post, and see you next time!
