April Ipsy Unboxing 2016 ðŸŒ¼

Hello everyone! Today I will be sharing with you my Ipsy unboxing for the month of April.  If you don’t know what Ipsy is, it’s a website where you take a little quiz (to get information like eye color, hair color, what skin problems you have, etc.) then by just paying $10 a month, you get a little bag with personalized sample products in it. Ipsy also tends to have more full sized products in it. It comes once a month, about mid-month, and you get 5 samples in it to try out. I think this is a super cool idea if you want to try more beauty products, hair products, skin products, and more, especially higher-end ones, but don’t want to shell out a lot of money for it if you don’t know how it works. If you’d like to check Ipsy out, you can do so here. Now let’s get into the unboxing! 
The bag:
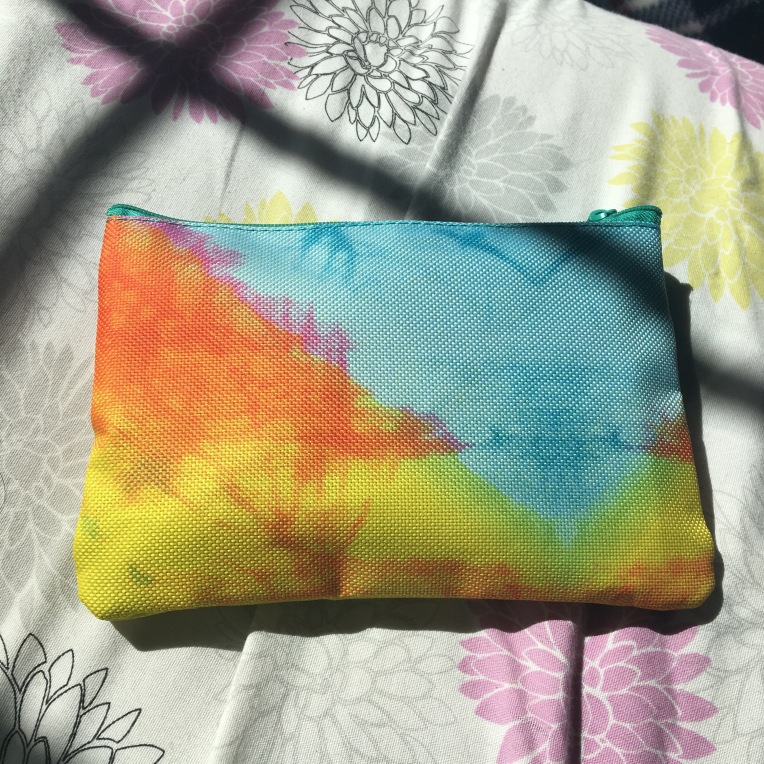
  
The bag this month is so adorable. It’s a blue, orange and yellow tie-dye bag, and I would definitely use this all the time. 
Item #1:

  
First I got this Probelle Nail Polish in the shade In or Out. This is a brand I am unfamiliar with, so I tried it out. It’s a gorgeous lilac/orchid shade that’s perfect for the springtime and it leaves a beautiful glossy finish on the nails. Without a top and base coat, it can peel right off but it stays on with them. 

Item #2:


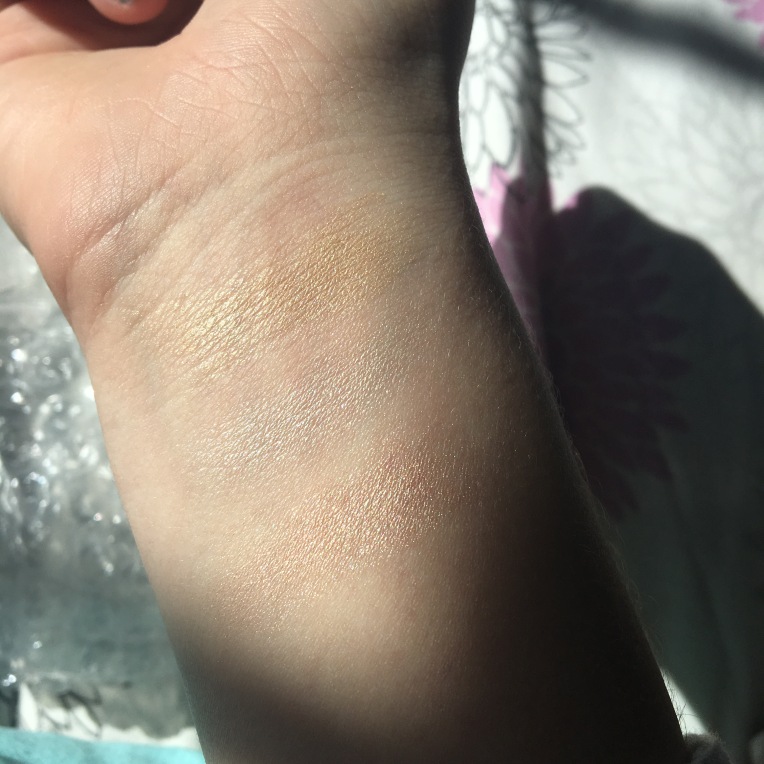
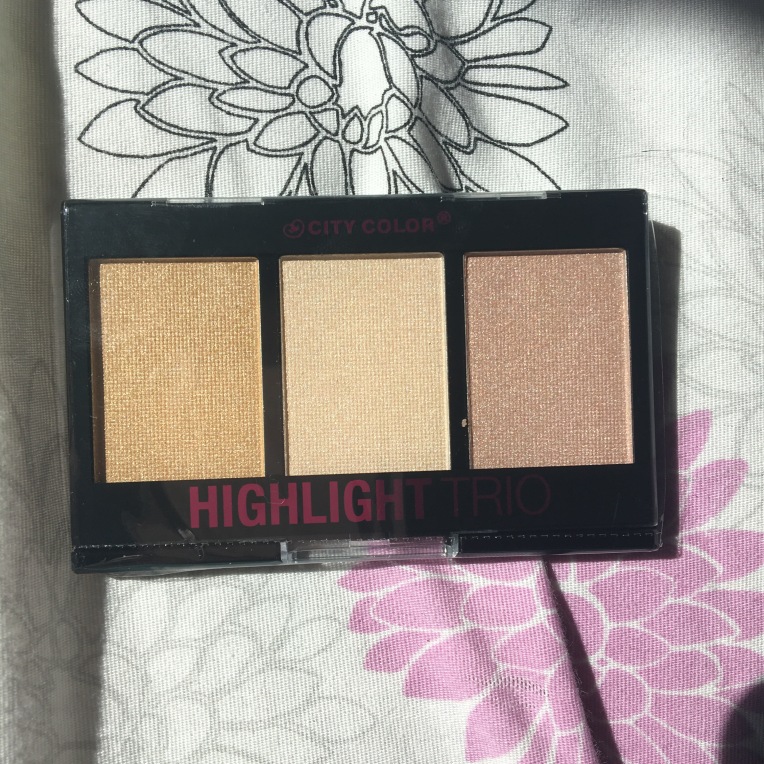
Next I received this City Color Highlight Trio. I think this is a wonderful product because they used different shades so that they could match a wider range of skin tones. I didn’t own any highlighter at the moment since it wasn’t an everyday makeup product for me but I am so happy to have received this. The pigment and colors are all beautiful, and it’s not glittery to the point that it’s noticeable, it’s more of a subtle shimmer. I would definitely recommend this to anyone who’s looking for a new highlighter, although I don’t know if this is sold online/in stores, or if it’s exclusive to Ipsy. The swatches I did go in order from left to right in the palette, with the gold shade on top. 

Item #3:

  
The next product in my Ipsy bag is this Jor’el Parker Fango Mud Therapy Mask for Face and Body. Unfortunately, I have yet to try this since I recieved my bag midweek and I’ve been busy with schoolwork. However, it seems like a nice product and smells good so I think I’ll try it out tomorrow and probably update this post to let you know how it works out. 

Item #4:

  
The fourth item I received is this Briogeo Don’t Despair, Repair! Gel-to-Oil Hair Treatment. I was already looking for a light oil since I have well water at my house which dries out my hair, so I was looking forward to trying this. I wouldn’t say my hair is oily, it’s about average, but it can get oily very quickly. I tried this out last night and I’m not quite sure how I feel about it. I know it’s a gel-to-oil hair product, but I didn’t think it would have he texture like hair gel, which is one that I don’t particularly like. On the back of this sample it says to put 1-2 nickel sized amounts all throughout your hair from root to tip, and I would only recommend using that amount if your hair is extremely dry. If your hair gets easily oily like mine, I would use less and not put it on the roots, only on the ends. This is probably a great product for people with dry/frizzy hair, but it doesn’t really work for me. 

Item #5:


I saved the best for last! I was so excited when I saw this product in my bag. It’s a tarte LipSurgence lip creme, in Wonder. It’s in a crayon form (not sure if the full size is or not). I’ve heard so many wonderful things about tarte, especially their lip products and I know that they’re a higher-end brand which is why I’m reluctant to buy their products without trying then first, and I’m glad I got the chance to do that. This is an extremely moisturizing product, which is amazing since I’ve been having problems with dry lips lately. It’s a beautiful muted, berry-red color, which is more like a subtle red. It’s very pigmented, and relatively long-lasting. It does wear off around the inner lip area but that’s easily solved with reapplication. 

Overall, I had a fantastic Ipsy bag this month with great products. I hope you guys enjoyed this post, and see you next time! 

Ipsy Unboxing: March 2016 â˜˜

Hi everybody! I received my ipsy bag fairly early this month, on the 10th I believe, so I come to you guys today with my ipsy unboxing for the month of March. This is only my second month using this subscription service, and I already love it. If you don’t know what Ipsy is, it’s a website where you take a little quiz (to get information like eye color, hair color, what skin problems you have, etc.) then by just paying $10 a month, you get a little bag with personalized sample products in it. Ipsy also tends to have more full sized products in it. It comes once a month, about mid-month, and you get 5 samples in it to try out. I think this is a super cool idea if you want to try more beauty products, hair products, skin products, and more, especially higher-end ones, but don’t want to shell out a lot of money for it if you don’t know how it works. 

Now let’s get into my post!
  
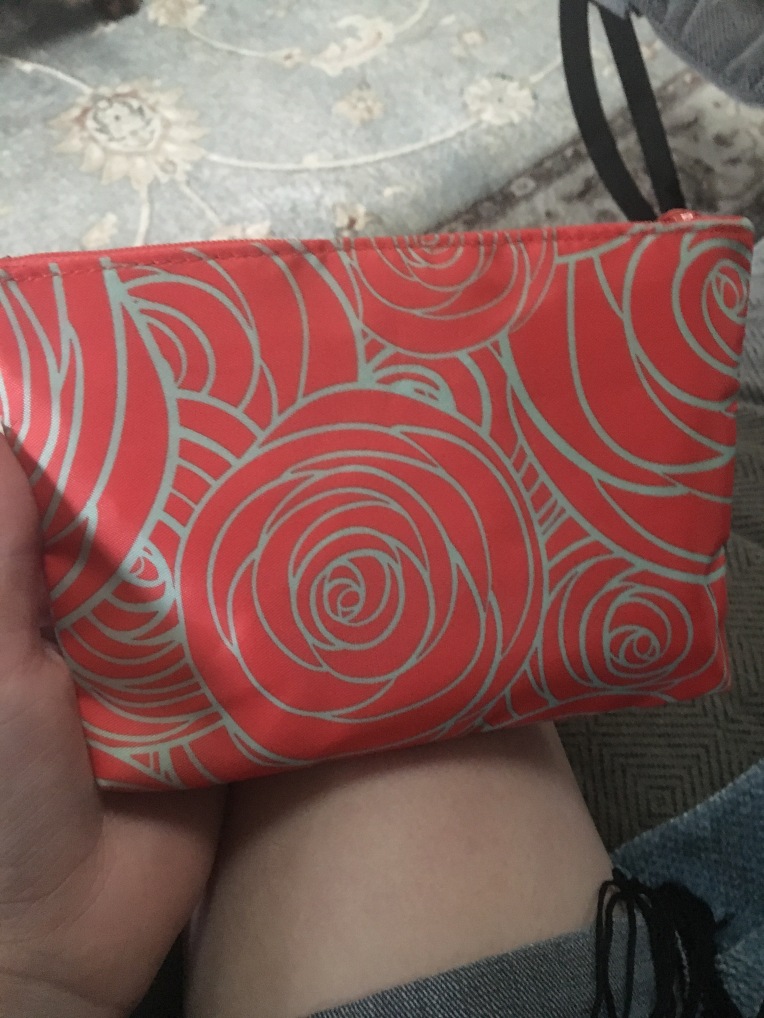
So from following Ipsy on Instagram, I saw that they came out with 3 colors of Ipsy bags for March and I got the green and red-orange one. It’s a pretty basic bag, with a rose pattern and a simple material. The theme for this month was hello spring, since spring is coming up and that excited me for some new (hopefully) brightly colored products.
  
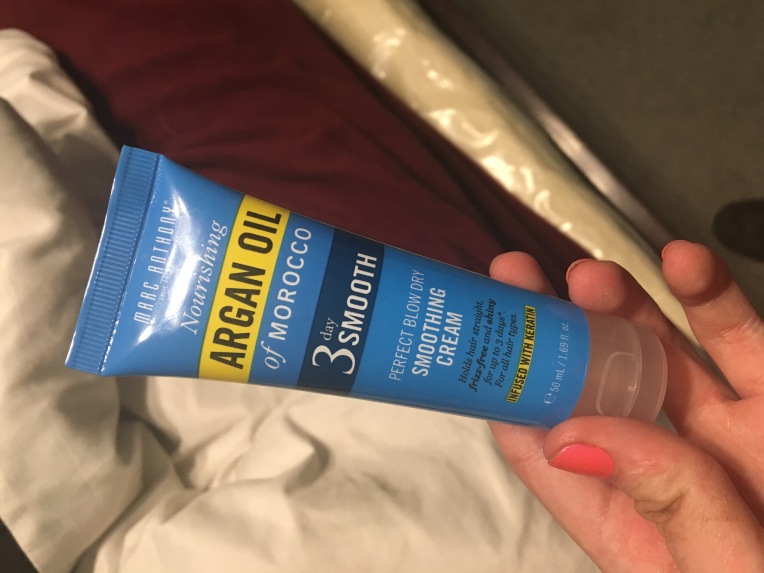
The first thing I got in my Ipsy bag is this Nourishing Argan Oil of Morocco 3 Day Smoothing Cream by Marc Anthony. I had heard great thing about this brand before, and I had yet to receive a hair product in my Ipsy bag so I was super excited to try this. And I absolutely love it! It claims to smooth and almost straighten hair for up to three days. I used this how the directions said, and I was amazed at the results. My hair has a bit of a natural wave to it, but it isn’t near curly. When I used this, I noticed that my hair was much straighter than usual. I don’t know how it would work on people with wavier or curly hair, but for this purpose it works wonderfully for me. It also hydrates my hair, making it look as if I got it styled and washed at a salon. It made my hair very glossy and smooth. And since I have moderately thick, long hair, my hair tends to feel heavy, but this made my hair feel lightweight. Since this product worked so well for me, I decided to look up how much a full prices size would be because it would be something I would purchase myself. I was expecting it to be expensive, but I was surprised at how affordable it is. It retails for about $8 at full size, and is sold in Ulta and Rite-Aid. Overall, this is a really great product I would recommend to almost everyone, and especially for people who have dry hair and split ends. 


The next thing I recieved was this Evologie Intensive Blemish Serum. I have extremely sensitive skin, and I didn’t know how I would react to it, so sadly I couldn’t use this and had to pass it along to someone else. 


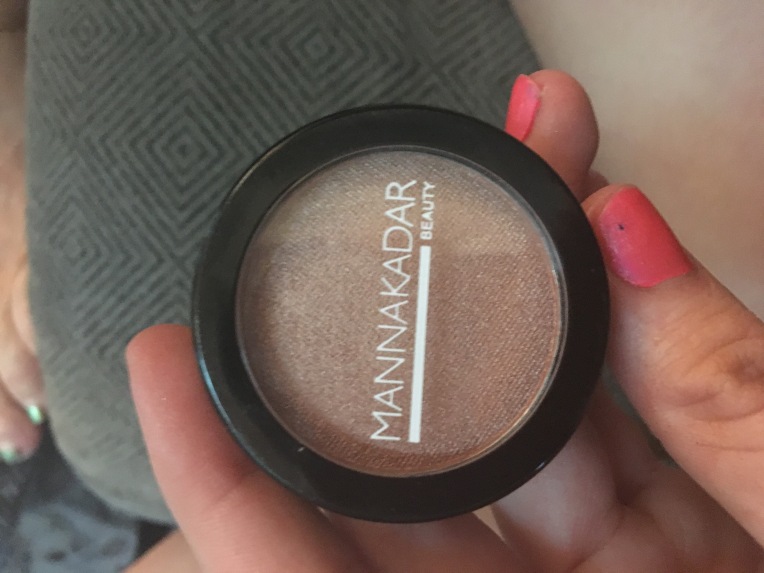
The third item in my Ipsy bag was this Mannakadar Beauty Eyeshadow in Fantasy. I had never heard of this brand before, but I was pleasantly surprised. It’s a pressed eyeshadow, which I prefer way more than loose powders, and it’s a gorgeous shimmery nude color. It’s extremely pigmented, in the swatch above I only swiped it on once. And it feels like a very nice, high quality product. I like how universal this color is, and you can wear it everyday. 


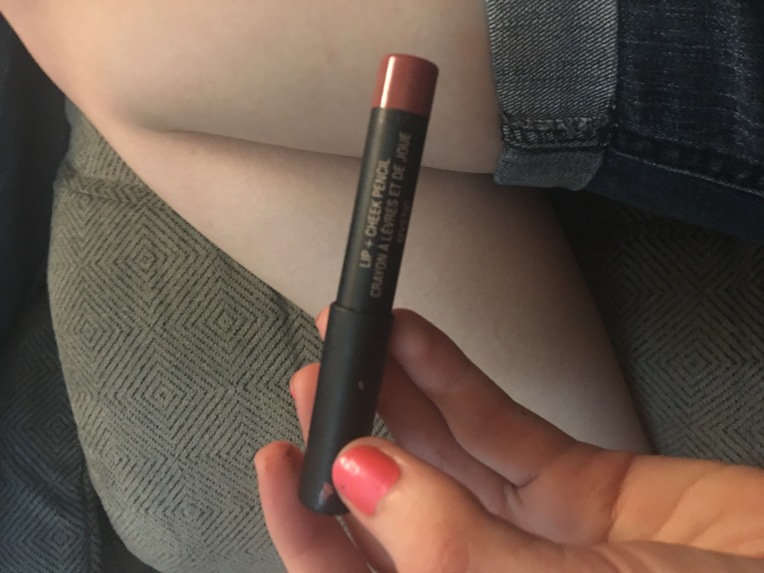
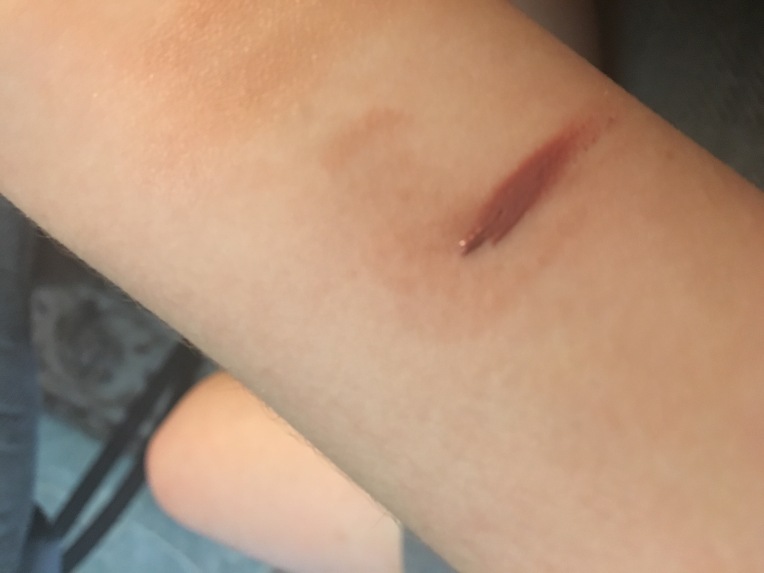
Lip and Cheek Pencil by  Nude Stix in Mystic  
 

I was interested in this product at first, since I had never tried anything like this before. But when I swatched it, I could already tell I didn’t like it. The color is very nice, but it has a formula that I absolutely hated for some reason. I would not recommend this to be used on the cheeks, because this has a formula that just seems like it should go on the lips. It’s a very thick, heavy, sticky, nondrying product. The color is gorgeous, but there’s nothing else I liked about it. It doesn’t seem like a lipstick to me, but it’s unlike any lip product I’ve ever used. It never fully dries on the lips like lipstick does, and is very sticky on the lips. Overall, I’m pretty disappointed with this product (honestly I threw it away after the first use), but Ipsy is about trying new products. 


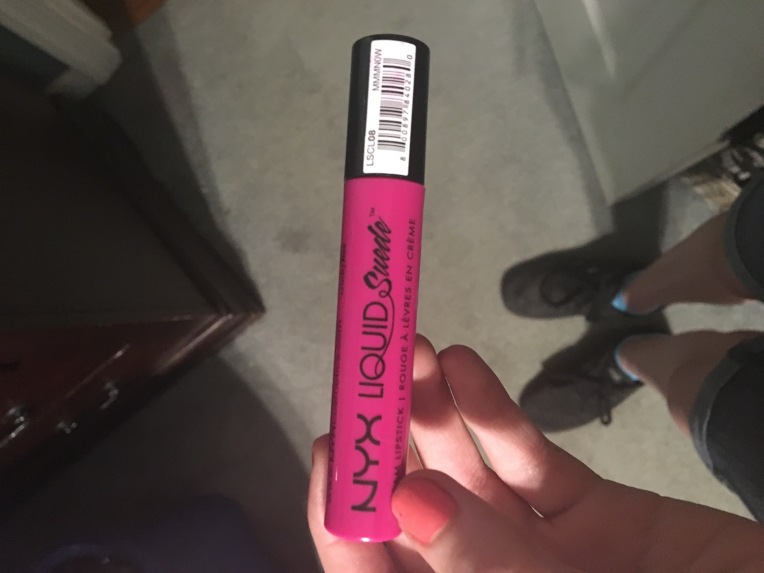
Nyx Liquid Suede Cream Lipstick in Pink Lust/ Passion Rose. 

This last product was the one I was most excited for. I’ve been wanting to try some of Nyx’s new lip products for a while, so when I saw this I was psyched. I know that this is a very affordable product, ranging from about $3-5 in CVS Pharmacy so I love that I got the chance to try it out before buying it without knowing how it works on me. I love Nyx’s original cream lipsticks, so I was hoping that this would have a similar formula. It’s a beautiful bright pink color, great for spring and summer. It’s very creamy, and easy to apply. It only took one application to get the perfect pigmentation. After about 4 hours, it gets a bit drying but that’s not anything major since most lipsticks do that anyway. Then after about 6 hours, it starts flaking towards the inner parts of the lips, but it can be easily reapplied. Overall, this is a beautiful product I would definitely buy with my own money. 

That’s all for my March Ipsy! I hope you guys enjoyed this post, and see you next time. 

Get Ready With Me: Homecoming 2015

Hey guys! Last night was my school’s homecoming dance, so I thought I would show you my dress and how I did my hair and makeup. Let’s get started! 
  
Dress- Papaya, $27

Shoes- Charming Charlie’s, $17

I went shopping for a dress last weekend. I was looking for something that was cheap and cute, and that I could wear more than once. The theme for my dance was A Night in the City, and I thought that this dress matched the theme perfectly. 

Hair

First I started off by spraying my hair with some heat protectant spray. I then clipped up my two top layers of hair. Next I curled the layers using my Remington Curling Wand (Target, $25). I started at the roots and curled from the middle of the wand to the smaller end. I then re-curled my ends, and sprayed it again with heat protectant spray to keep the curls in for longer. 


Makeup 


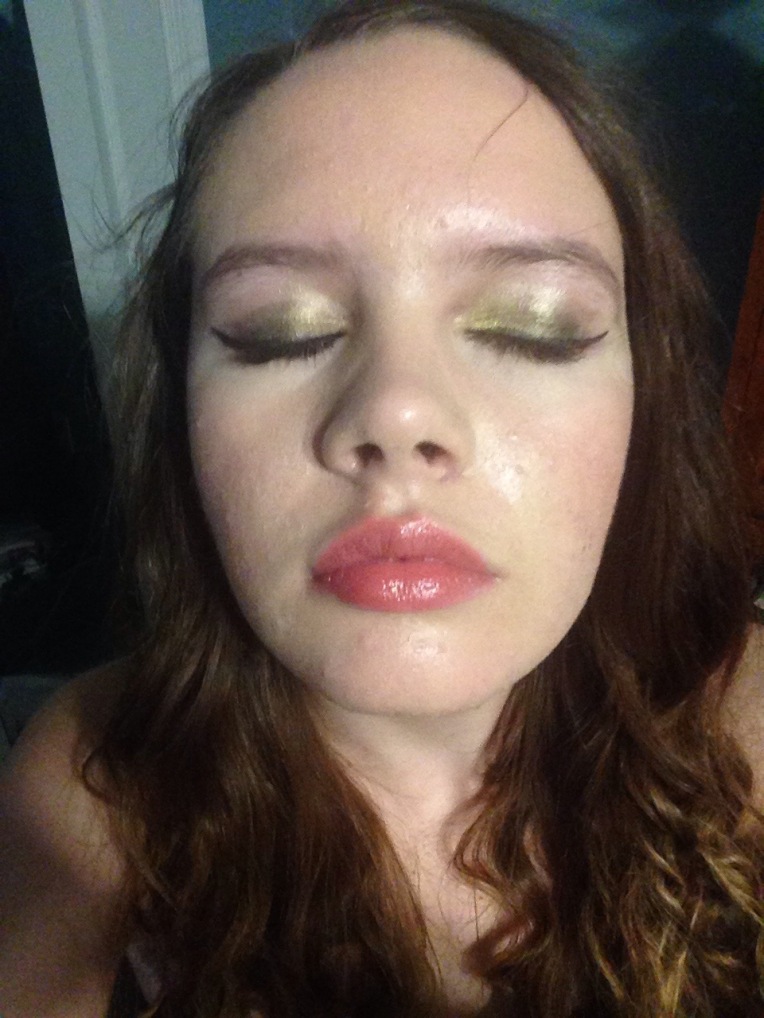
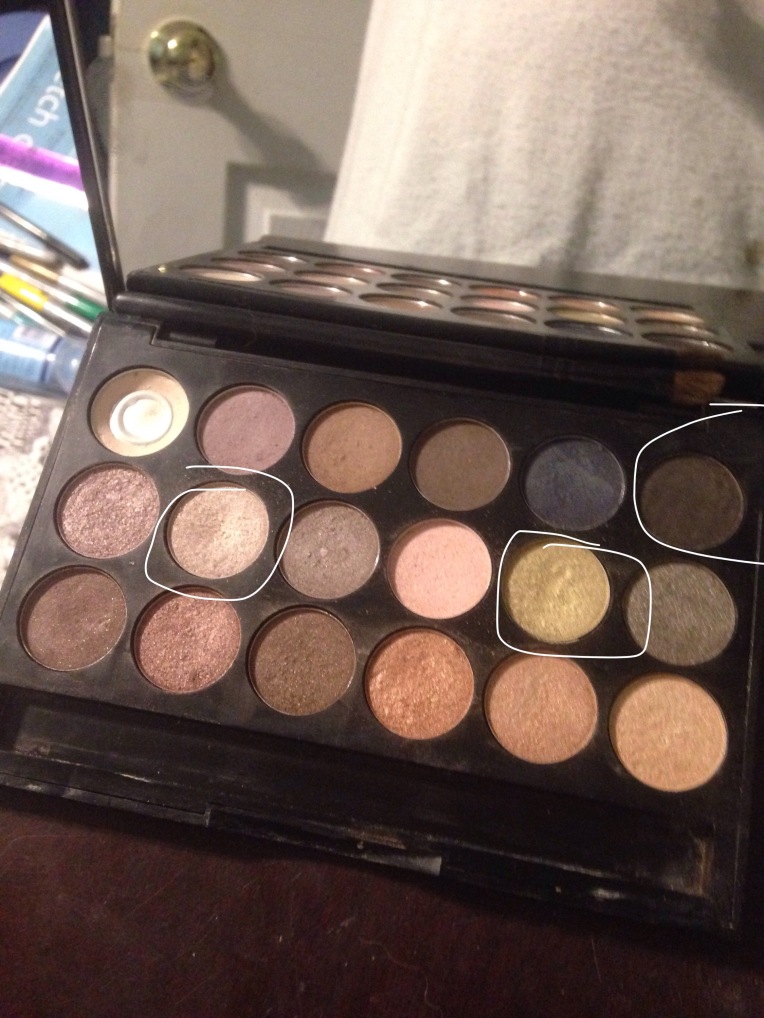
First I applied a matte primer to my face and primed my eyelids. Next I put on my foundation and concealer. Then I used an elf eyeshadow palette (Target, $6) and I applied a shimmery champagne shade all over my lids, up to my eyebrows. Then I applied a shimmery gold shade over my lids. Next I took a matte black shade and blended it at the outer corners of my eyelids. 

  
After that, I used my Nyx Super Skinny Eye Marker (eyeliner) in Carbon Black and drew a medium sized line, adding a flick at the end to make a cat eye. 

Next, I applied a medium shade of pink blush to my cheeks to give my face a bit more color.  I then put on my Burt’s Bees Lip Color in Redwood Forest (CVS Pharmacy, $8) 

And that completes the look! I hope you guys enjoyed this post, and see you next time! 


5 Pinterest Summer 2015 Makeup and Hair Trends To Try

Hey guys! Today I want to show you 5 hair and makeup trends I found on Pinterest. I think these are really cool and you should definitely try them out if you like them. I just want to say before we begin, that none of these pictures are my pictures. I found all of them on Pinterest and I do not own any of them. Now, let’s get into the post! 

#1: Long Bob (Or “Lob”)


I think this is a super cute medium-short hairstyle. This is great for if you have really long hair and you want to cut it, but you want to grow it out again. I think this is a really nice, effortless looking hairstyle that can work on almost anyone. 

#2: Nails with Gold Accents


I think this is a very sophisticated look for your nails. It’s kind of girly, and it looks great for a fancy event or holiday. 

#3: Bright, Bold Eye Makeup


I think this looks great for the summer. It can be a hard trend to make look amazing, but once you do, you wear it to so many places. It’s definitely better for a more formal event though. This is not something I would wear just because I’m not sure if I can pull it off, but on the right person, it can look great. 

#4: Purple Lips


I love this trend so much! Purple lipstick looks great anytime of the year, but it’s especially popular right now. This is something I like to wear often. It can look very mature if you wear it the right way. This is something that is a bit more bold, but it looks nice on everyone. (In case you wanted to know, in the picture above, I believe the lipsticks are from the Sephora brand)

#5: Floral Nail Art


Floral Nail Art is something that looks beautiful year round, but it really gets a boost in popularity around Spring and Summer. This looks the best during summertime with brighter colors. 

If you would like to see more like this, follow me on Pinterest here

That’s all for today’s post! I hope you guys enjoyed it, and see you next time. 


How to do a ‘Mohawk’ French Braid

Hello everyone! Today I wanted to show you a modern, edgy twist on the traditional French braid hairstyle. I actually just tried this out one time when I was bored with how my hair looked, and it looked great! Anyways, let’s get right into it. 
Step 1: Brush out your hair so it’s tangle-free, and then comb it back so you have no part. 

Step 2: Take a medium-small section of hair from the very front of your head, close to your face, and separate it into three section. 

Step 3: Braid the sections together for one rotation, then add more hair to each section of hair and braid it in. 

Step 4: Continue adding sections into the braid until you have used all of your hair, then braid the rest of your hair in a regular braid. 

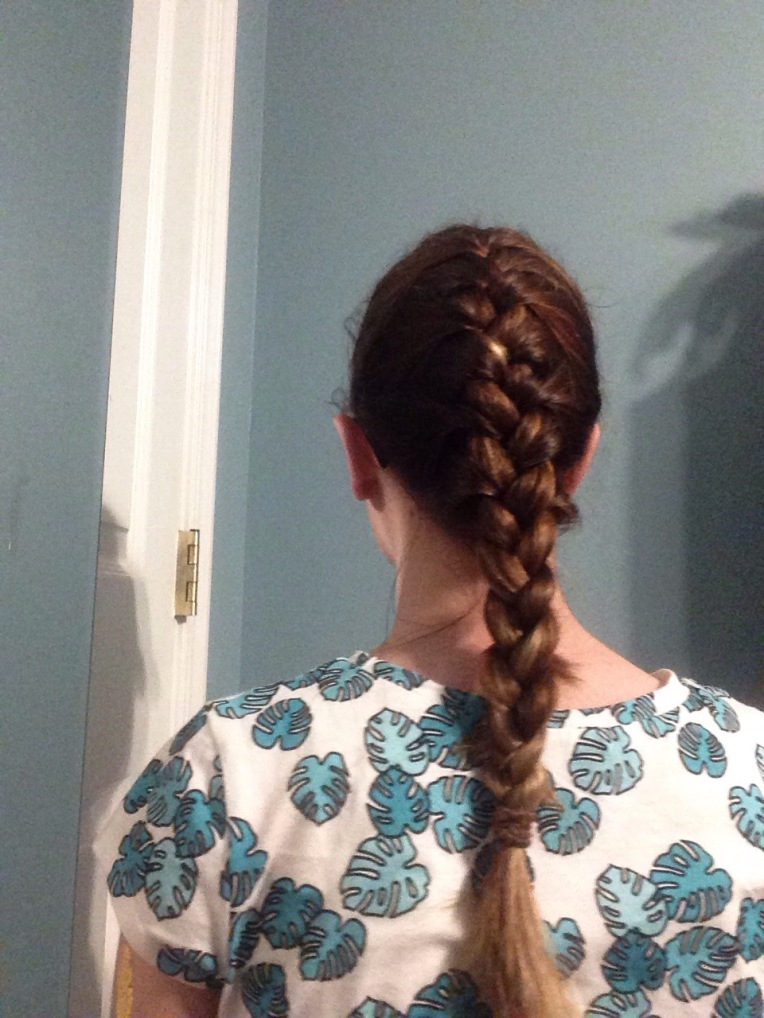
Final Result: 


This hairstyle is basically just a normal French braid that starts closer to your face with smaller sections added in. Because it starts father up on your head, you achieve a ‘mohawk’ effect which can go great with an edgy outfit, or you could dress it down to look more girly. If you feel like this hairstyle is not something you would wear, you can just wear it overnight and when you take it out, you will result in beautiful heat-less beachy waves. I really like this hairstyle. I think that it’s super easy to do, and it’s very versatile. 
That’s all for today’s post! I hope you guys enjoyed it, and see you next time. 

Get Ready With Me: School Semi-Formal Dance

Hi Everyone! Yesterday was my school’s semi-formal dance, which was super fun! So today I wanted to show you guys my outfit and hair, and tell you how to do my hairstyle. Let’s get right into it! 

Outfit:

 
Navy Blue Lace Jeweled Bodycon Dress- Dillard’s, $90 on sale 

Silver Glittery kitten heels- Payless, $25

Hairstyle:
  
This hairstyle is a French Fishtail Braid twisted into a side bun. 

Step 1: Comb your hair back. 

Step 2: Grab a section of hair at the right side of your head and split it into two sections. 

Step 3: Start it like a regular fishtail braid with only one rotation. If you need help, here is a link to an earlier post that can help you:

https://nicolefemme2000.wordpress.com/2015/01/14/5-cute-quick-and-easy-hairstyles-for-school/

Step 3: Start taking an outside section of hair and adding more hair to it, then crossing it over to the inside of the other section. 

Step 4: Continue doing this across to the left side of your head. 

Step 5: When there is no mor hesitate to add to it, braid like a regular fishtail braid all the way down. 

Step 6: Secure with a hair elastic that matches your hair color, then twist it in a bun shape.  

Step 7: Secure the bun with lots of bobby pins, hiding the end of the braid in the middle, and cover it with jeweled bobby pins if you would like. 
And you’re done! This hairstyle is moderately easy, but time consuming. But the time spent is wort it because it looks elaborate and professional. I am super proud of this hairstyle, and I hope you guys try it out. 

That’s all for today’s post! I hope you guys enjoyed it, and see you next time. 


4 Strand Lace-Up Braid

Hello Everyone! Today I went shopping with my friend for a dress for my formal school dance. So I’m super excited to make a post for getting ready for formal night later this month. Anyways, today I’m going to show you guys how to do this cool hairstyle I discovered. I found the directions for a braid on Pinterest, but it I looked totally different when I did it so I’ll just tell you my way of doing it. Let’s get started! 
Step 1: Part your hair to the side. 

Step 2: On the side of your part with more hair, grab a 1-inch section in the front, divide it in two, then divide those sections in two. 

Step 3: The easiest way to think of doing this is to number each section from left to right, 1-4. 

Step 4: Take section 4 and put it over section 3. Then take section 2 and put it over one, then wrap it under one and over section 4 (which will be in the right side of the middle at this point) 

Step 5: Renumber the sections left to right, 1-4, and repeat step 4 until you get to a stopping point. 

Step 6: Secure the braid with some bobby pins, and put a cute bow or clip over them if you would like.  
The finishing result: 

  
This little braid is pretty easy once you get the hang of it, and it looks super cute for school. I love this for a more casual day. I hope you guys enjoyed this post, and see you next time! 
5 Ways to Make Your Ponytail Pop

Hey guys! Today I wanted to do a hairstyle post for you. This is perfect for if you want a simple, quick hairstyle for the morning but you want to make it more stylish, or if you have PE at school or are going to the gym and want to keep your hair out of your face while still looking cute. I will show you 5 ways to spice up your ponytail. So here they are! 

1: Hair Accessory 

One really easy way to make your ponytail look cuter is to add a pretty hair accessory. One of my favorite things to do for this is to put a little adorable bow on above my ponytail, but a little bit to the side. Of course you can use other things like flower clips, but bows are my personal favorite.


Red Velvet Bow: Forever 21, $3

2: A Unique Hair Tie

There are all sorts of hair ties you could use, and if you find a really cool looking one, it is great for making your hairstyle look more in style. 


Jeweled Fox Hair Tie: Charming Charlie’s, $6

3: A Braid along one side of your ponytail

This is probably the most time consuming. For my braid, I did a French fishtail braid and I will teach you guys how to do it. 

Step 1: Comb your hair back so there is not part. 

Step 2: Take a 1-inch section of hair in the middle area of the front of your head, then divide it in two. 

Step 3: Take a smaller strand on each side of the bigger strand. Starting with the left side, add the small strand to the bigger strand on the left. Then grab the smaller strand along with some additional hair and add it to the inside of the big strand on the right. Continue this on the opposite side. Then continue this across the side of your head until you get to a point where you want to stop. 

Step 4: Bobby pin the braid to your head, and comb back the rest of your hair. Gather all of the hair into a ponytail. 

The result: 


4: Simple Twist

This is a very simple hairstyle that you can do in literally 5 seconds. This looks so cute, even if you don’t put your hair in a ponytail after doing the twist. 

All you do is you comb your hair back, then grab a section on either side of you head, twist it back, pin it, then put all of your hair into a ponytail. 


5: Ponytail with a Twist

This one is pretty easy once you get the hang of it, but I think it’s easier and it looks better with a side ponytail. 

Step 1: Comb your hair back and put it into a loose ponytail. 

Step 2: Pull the hair tie down your ponytail a little bit, then divide your hair into two even sections above the hair tie. (This will create a hole) 

Step 3: Pull your ponytail up and over through the hole, so the sections twist. Then pull the ponytail tight. 

The finished hairstyle:  


These are some of my favorite ways to make a ponytail look cuter. I hope you guys enjoyed this post, and will try this stuff out. Here is the link to my other hairstyle posts: 

https://nicolefemme2000.wordpress.com/category/hairstyles-2/

See you guys next time! 

How to Waterfall Braid

Hi guys! Today I wanted to show you one of my go-to hairstyles. This braid is very intricate and difficult looking, but it’s extremely easy to do. Let’s get right into this! 

Step 1: Part your hair to the side. 


Step 2: On the side of your part with more hair, take three small strands of hair and braid them one cycle. 

Step 3: Next, pull the top strand in-between the other two strands, and twist the other two pieces around it. 


Step 4: Take strands of hair and pull them through the other two strands, repeating Step 3 until you have reached the back of your head. 

Step 5: Pin back your braid with a cute pin or bow if you would like to make this look even cuter. 

Finished Hairstyle: 


And you are done! This looks super hard, but it’s so simple and quick! I love to wear this to school when I don’t feel like putting much effort into my hair but I still want to look nice. I hope you guys enjoyed this post, and see you next time!