Ipsy Unboxing|February 2016!

Hey guys! So a few days ago I got my first Ipsy bag and I was so excited. If you don’t know what that is, it’s a website where you take a little quiz (to get information like eye color, hair color, what skin problems you have, etc.) then by just paying $10 a month, you get a little bag with personalized sample products in it. Ipsy also tends to have more full sized products in it. It comes once a month, about mid-month, and you get 5 samples in it to try out. I think this is a super cool idea if you want to try more beauty products, hair products, skin products, and more, especially higher-end ones, but don’t want to shell out a lot of money for it if you don’t know how it works. I love how affordable this service is. So since I got this subscription, I will do a post on it reviewing the products each month, starting with this month’s. If you’d like to subscribe or just check Ipsy out, you can do so here. Now let’s get into today’s post!


So this is what this month’s bag looks like:

IMG_6362

IMG_6364

The front has a bumpy texture, and the image of a pixelated letter with a heart on it, which is super cute for Valentine’s Day. And the bag is just a glossy, hot pink color. I can definitely see myself using this for travelling and carrying my makeup or other products.


The theme this month is Pretty in Ipsy Pink, which is obviously for Valentine’s Day. So most of the products in my bag are pink themed.


IMG_6366.JPG

The first product in my bag was this Luxie Small Tapered Blending Eye Brush. This is a very nice brush. The color scheme is really cute, and the bristles are soft. I already have a couple of eye blending brushes, but I like this one a lot more and I probably will use it more since it’s more high-quality than the ones I already own.


IMG_6367

IMG_6369.JPG

The second product in my Ipsy bag is this Naked Cosmetics Loose Mica Pigment.

This doesn’t really have a specific color name or anything, but I would describe it as this beautiful glittery champagne shade. It’s a pretty neutral color, so it works on all skin tones and all eye colors. This is extremely pigmented but easily blendable, and it looks like something I could wear everyday. The only thing that I don’t like about this (and it’s pretty minor) is the fact that it’s not a pressed powder eye shadow. I’m just not a particularly neat person, and knowing my luck, I would spill this all over the floor and myself, so I just have to be careful with this.


IMG_6370.JPG

The third thing I received was this Perfectly Posh Look Natural Best Face Forever Exfoliating Daily Facewash. I love this stuff! When you first smell it, it smells pretty strongly of mint which made me a bit of nervous because I don’t particularly like a very strong mint smell, but when used it has a nice fresh scent of mint that isn’t too strong with grapefruit undertones.  This is very nice , it’s probably my favorite product I got this month even though it doesn’t really go with the theme this month. It’s extremely refreshing, and leaves my skin feeling renewed.


IMG_6375IMG_6373IMG_6372

The fourth thing I received in my Ipsy bag is the Mr. Write (Now) Eyeliner Crayon in Jac by The Balm Cosmetics.

I saw a lot of other Ipsy unboxings where many people got this same eyeliner (but in different colors) and there were mixed reviews so I was excited to try this out for myself. One thing I really like about this is that it’s a screw-up eyeliner so you don’t have to sharpen it. It has great pigmentation and staying power, and the bronzy-brown color is a nice neutral eyeliner color that goes quite well with my dark brown eyes. Another thing I like is that the formula is sort of creamy, but it dries very quickly so you don’t run the risk of messing up your eye shadow.


IMG_6378IMG_6381


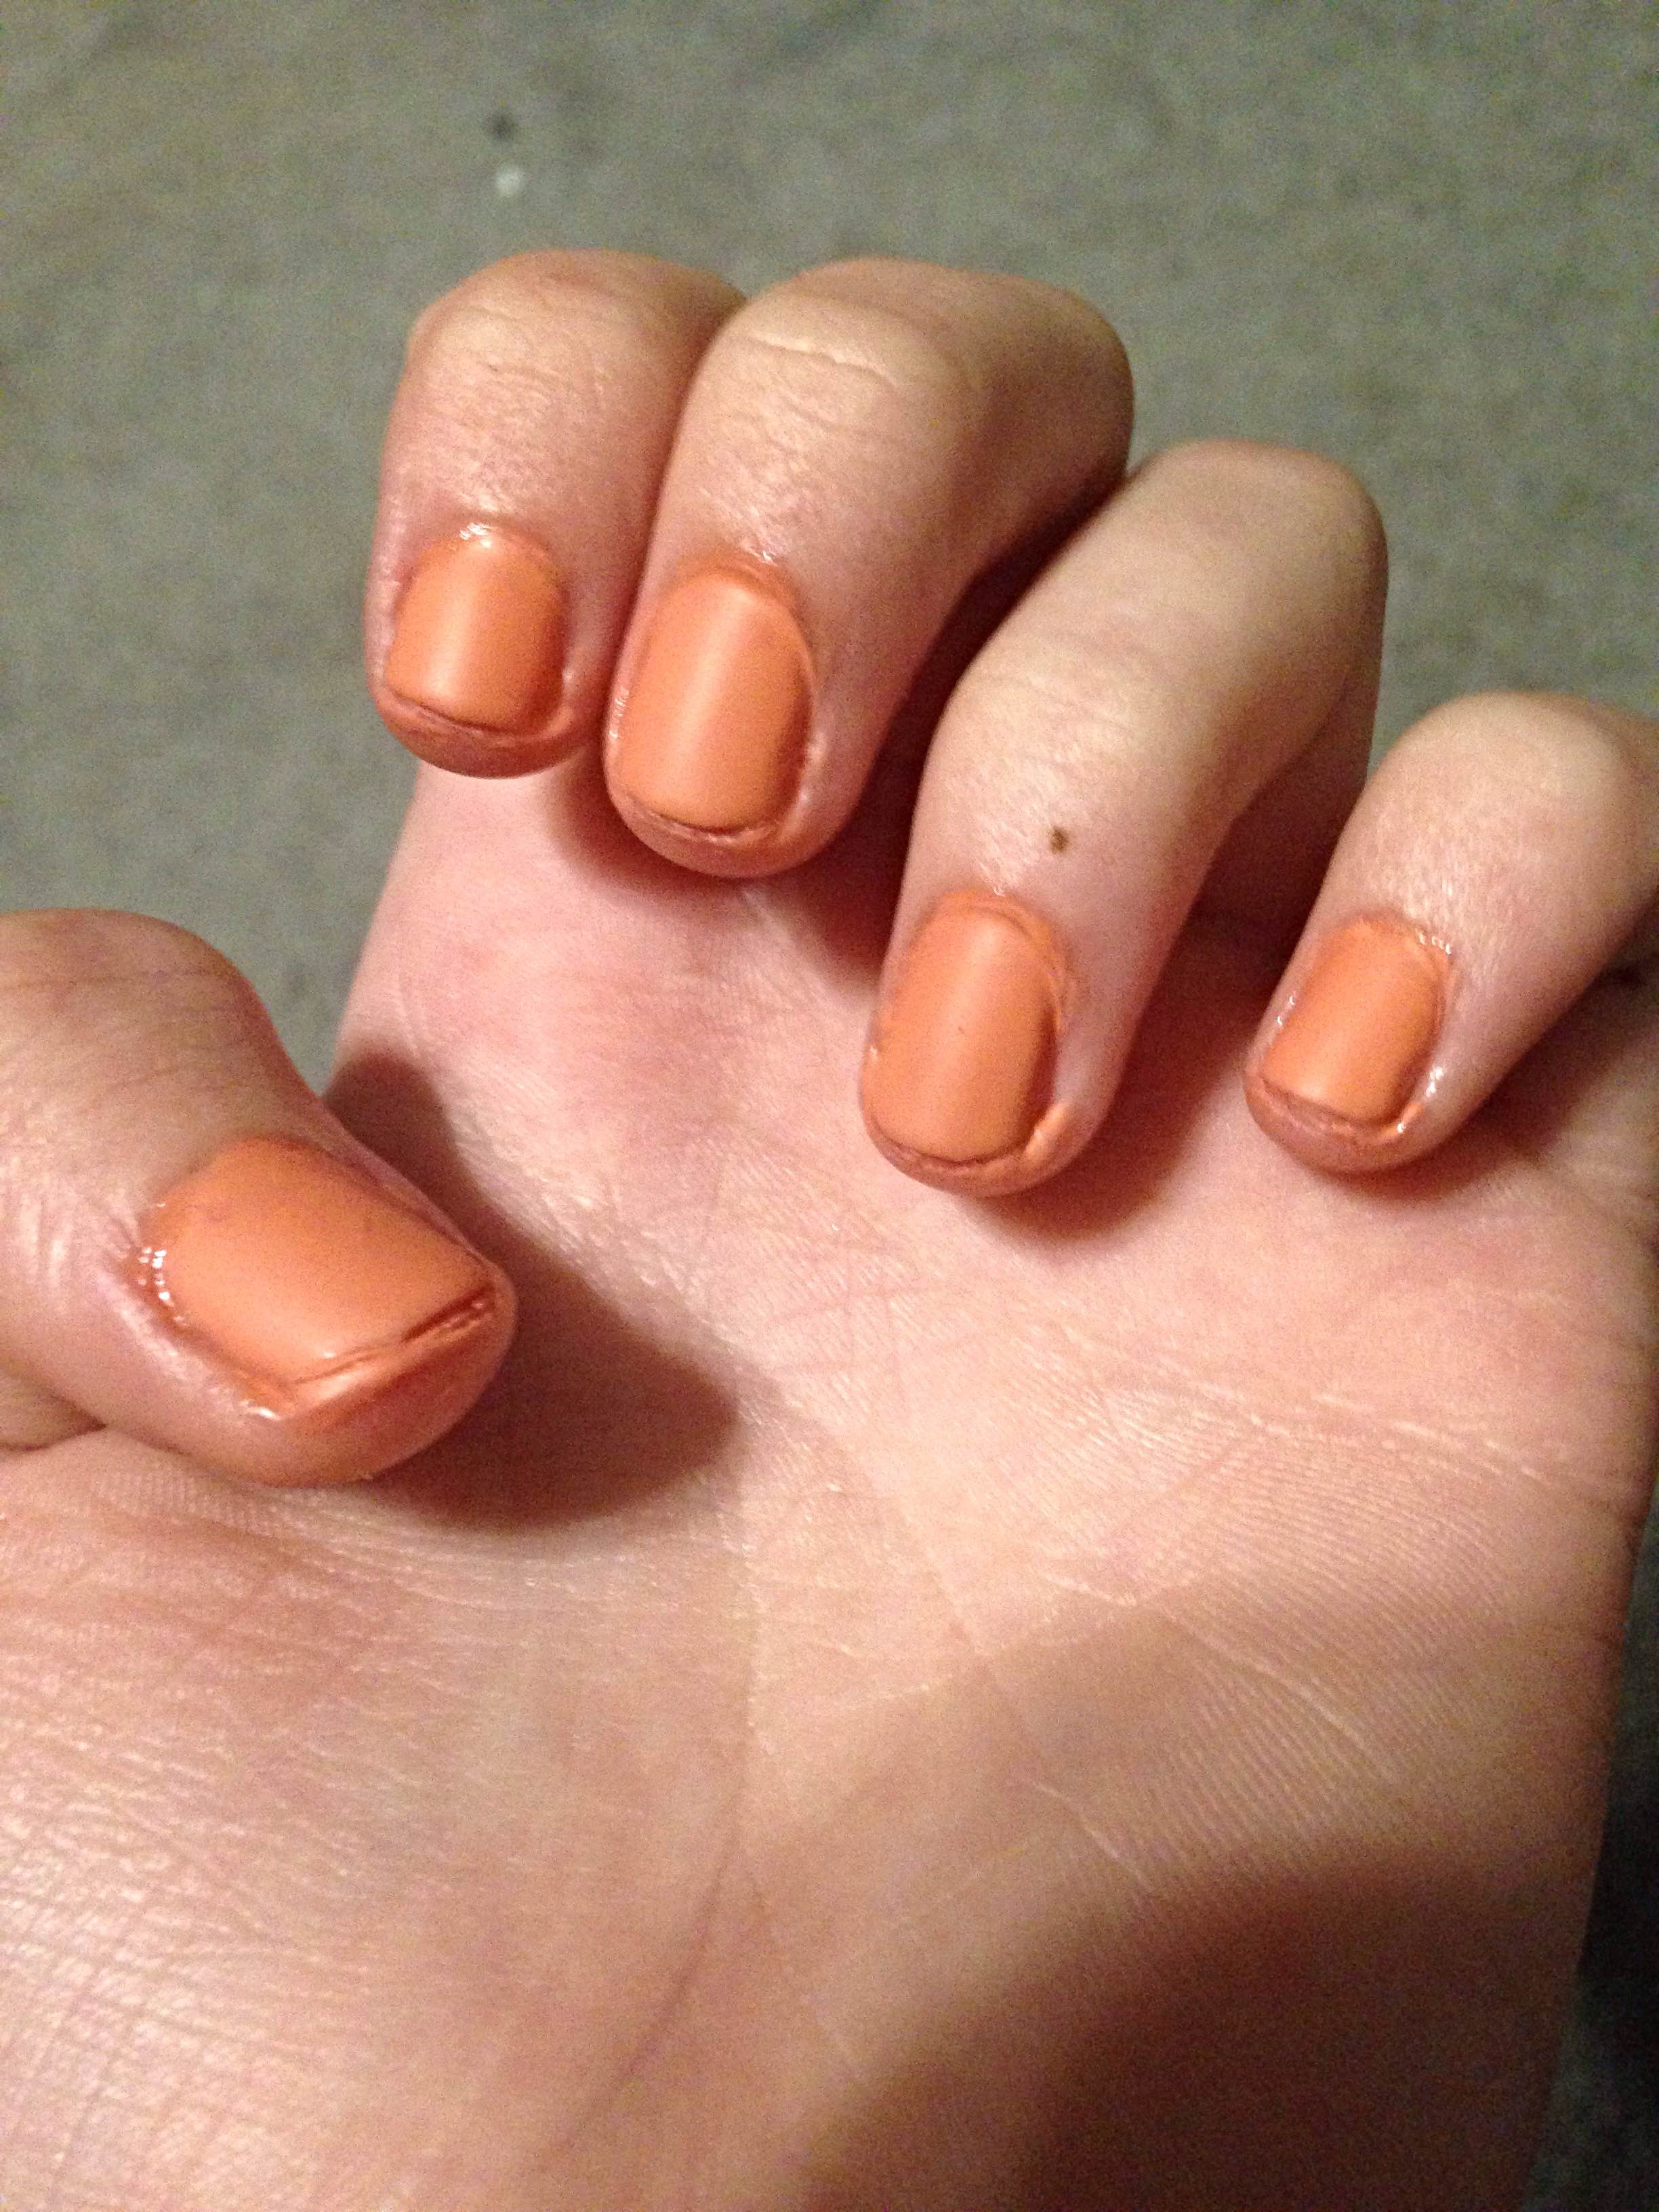
The final item in my Ipsy bag is the trèStique Baby Blush Stick in Bora Bora Coral.  I was a bit frightened of this color because it looked very bright, but when swatched it’s a beautiful coral color and it blends very easily. This is something that I would wear every day in the  spring or summertime. The only thing I don’t really like about this is that I feel like this isn’t a universally flattering color for all skin tones, but I can’t be sure.


That’s all I got in my Ipsy bag for February 2016! I hope you guys enjoyed this post and see you next time!

Valentine’s Day Makeup Idea ❤

Hi everyone! Today I went shopping with one of my friends and I got some stuff for spring this year and I’m super excited, so ;et me know in the comments if I should do a spring haul once I get enough clothes. Today, I wanted to show you a cute Valentine’s Day makeup idea. Let’s get right into it!

1. Apply moisturizer to your face to ensure it doesn’t dry out over the course of the day and wait a few minutes to let it dry.

 2. Apply concealer where needed, and foundation if you want. Then blend it with a blending sponge.

3. Apply a medium-dark pink shade of blush where it would highlight your cheekbones and blend it in.

4. Put some eye shadow primer on your eyelids, rub it in, and let it dry.

5. Take a shimmery light pink eye shadow and apply it to your eyelids.

6. Put on some eyeliner, but don’t extend the line. (Try to keep it simple)

7. Once your eyeliner dries, put some mascara on your upper and lower lashes.

 8. Apply a bright pink lipstick to your lips. 

IMG_1790 IMG_1794 IMG_1798

And you are done! This is pretty easy, and only takes about 10-15 minutes. I think is adorable, and looks great as a spring makeup look as well. I hope you enjoyed today’s post and see you guys next time!

SIDENOTE: On Monday, I have to ship my computer back to the computer company to get the cracked screen repaired, so I cannot post next Tuesday, next Saturday, and I might be able to post on the following Tuesday, but I don’t know. So don’t be alarmed if I don’t post for about a week; I just won’t have access to WordPress. And yes, my WordPress app still is not working.

Valentine’s Day Nail Idea ❤❤❤

Hey guys! Today I wanted to show you an adorable Valentine’s Day nail idea. I think this is so cute and you should definitely try it out if you have a little more time on your hands. Plus it looks way better than just plain red or pink nails. Let’s get right into it!

What you will need:

  • a base coat
  • a shade of nail polish in either red, pink, or white
  • a top coat
  • a matte top coat
  • a  heart glitter nail polish

IMG_1774


Sally Hansen Nail Hardener (works as a base coat)


IMG_1775

Nicole by OPI nail polish in Sweet Daisy


IMG_1778

IMG_1776

Essie Matte about you

IMG_1777

Nicole by OPI nail polish in Love Your Life

Step 1: Paint your base coat on your nails.

Step 2: Paint your colored nail polish on with as many coats as needed.

Step 3: Paint your top coat over your nail polish.

Step 4: Take your matte top coat and apply it to your nails.

IMG_1779

Step 5: Take your heart glitter nail polish and put it on each ring finger.

Step 6: Remove any excess nail polish on your fingers.

IMG_1780

And you are done! This is quite simple, but it also looks like you put a lot of time into it. I love this look for Valentine’s Day and I hope you do too!


DIY Valentine’s Day Room Decor!

Hi everyone. disregard that last post if you saw it because I think I can get this posted today. So today I wanted to show you some easy DIYs to make your room decorated for Valentine’s day. Let’s get started!

DIY Pom-poms:

What you will need:

IMG_1680

  • Pink or red yarn
  • scissors
  • a fork
  • wire

1: Start by wrapping your yarn around your fork until it gets to this thickness:

IMG_1690

2: Cut your yarn and tuck the ends into the yarn wrapped around the fork.

IMG_1691

3: Slip the yarn off of the fork and set it aside. Take your wire and cut about a 7-8 inch piece of it off. Then wrap your wire tightly around the yarn in the opposite direction the yarn is going, and twist it tightly.

IMG_1698

4: Cut the loops of yarn in half. Then, cut the yarn even shorter so it has a fuzzy texture, and make sure the yarn is all the same length. Cut the wire down so it doesn’t stick out, then arrange the yarn so it doesn’t show the wire.

IMG_1709

And you are done! This is super simple, and cute as well! These would look great on string lights, or glued to candleholders in your room.

DIY Paper flowers:

I have two ways to make some cute paper flowers, so here they are!

#1:

What you will need:

  • White Tissue paper
  • Scissor
  • a pink or red marker
  • bobby pins
  • green floral sticks
  • floral tape
  • tape

1:

Fold your tissue paper accordion style and bobby pin it in the middle.

IMG_1715

2: Roughly tear the edges of your tissue paper, then color them with the color of your choice.

IMG_1718

3: Take off the bobby pin and unfold the paper. Then fold the paper in half, and shape it to a flower shape. Tape your flower to your floral stick and cover the tape in floral tape.

IMG_1721

#2:

What you will need:

  • Red or pink crepe paper
  • Scissors
  • tape
  • Floral Tape
  • floral sticks

1: Cut a medium amount of crepe paper from the roll, and fold it into a small square.

IMG_1725

2: Cut off the top corners, so the to of the square is rounded.

3: Unfold the square, and line the rounded parts up unevenly.

IMG_1727

4: Fold the paper in half two times. Then shape it in a flower shape, and tape your flower to your floral stick and cover the tape in floral tape.

IMG_1730

Put your flowers together in a small vase and put it in your room.

IMG_1732

Lacy Candles

What you will need:

  • Black or white lace ribbon
  • Scissors
  • glue
  • A candle

1: If your candle has a label or sticker, peel it off.

2: Measure how much lace you will need and cut the right amount.

3: Put your glue on your candle in a zig-zag pattern where you want your lace.

IMG_1712

4: Place your lace over the glue, and with a paper towel, press down the lace. This will also help to get up the excess glue.

IMG_1713

And you are done! This is so simple, and looks great year-round.

These are all of my Valentine’s Day DIYs, and I hope you will try them! See you next time!